Update of service parameters
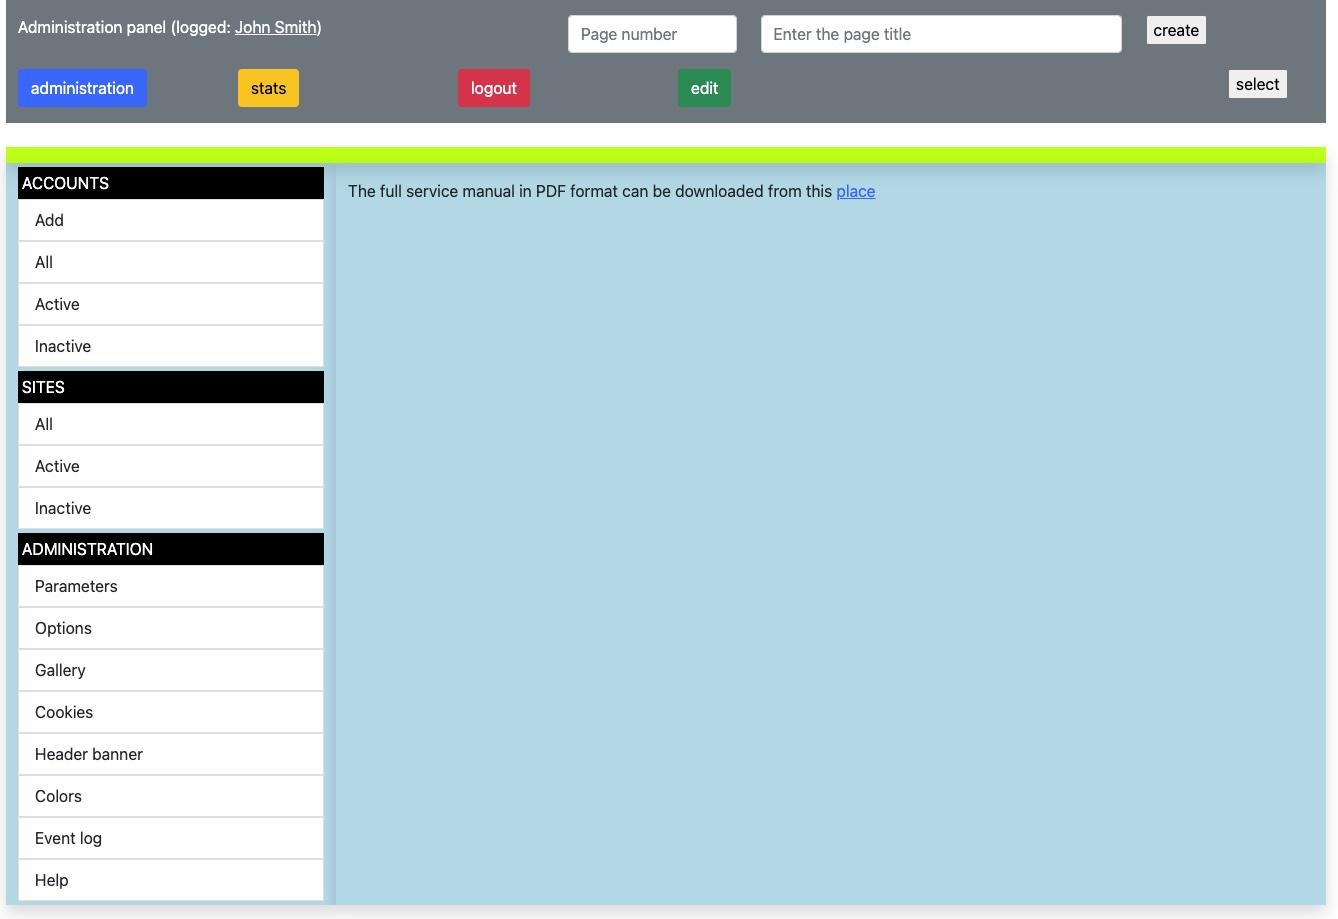
We should start our work on the newly established website by setting its operating parameters and checking the correctness of our registration data. To do this, click the "administration" button located in the administration panel (Figure 4/5). On the screen, you should see a submenu of the "administration" module, with three groups of links: "ACCOUNTS", "SERVICES", "ADMINISTRATION" (figure below).

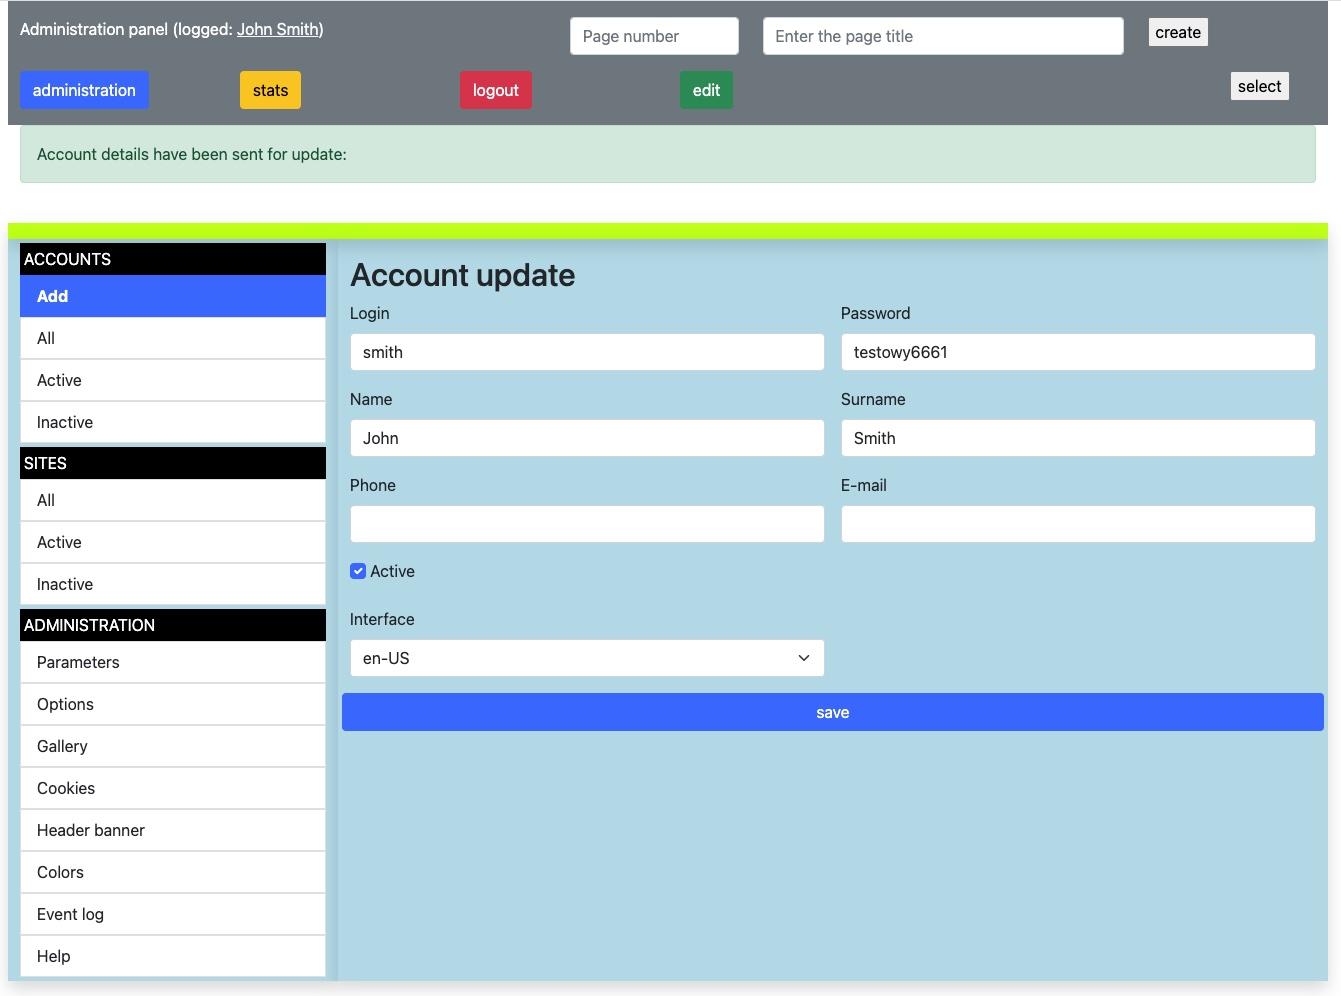
After clicking on your name (at the top of the administration panel), you gain access to a form that allows you to update your registration data (Figure 6). Here we can change the password (recommended for security reasons), update contact details and select the language version of our interface (see figure below). Note: Choosing the language version of your account interface does not affect other users, nor does it affect the language version of the site itself. Entering a valid e-mail address is important during the procedure of sending a forgotten password and enabling contact with us in order to notify about current changes in the system.

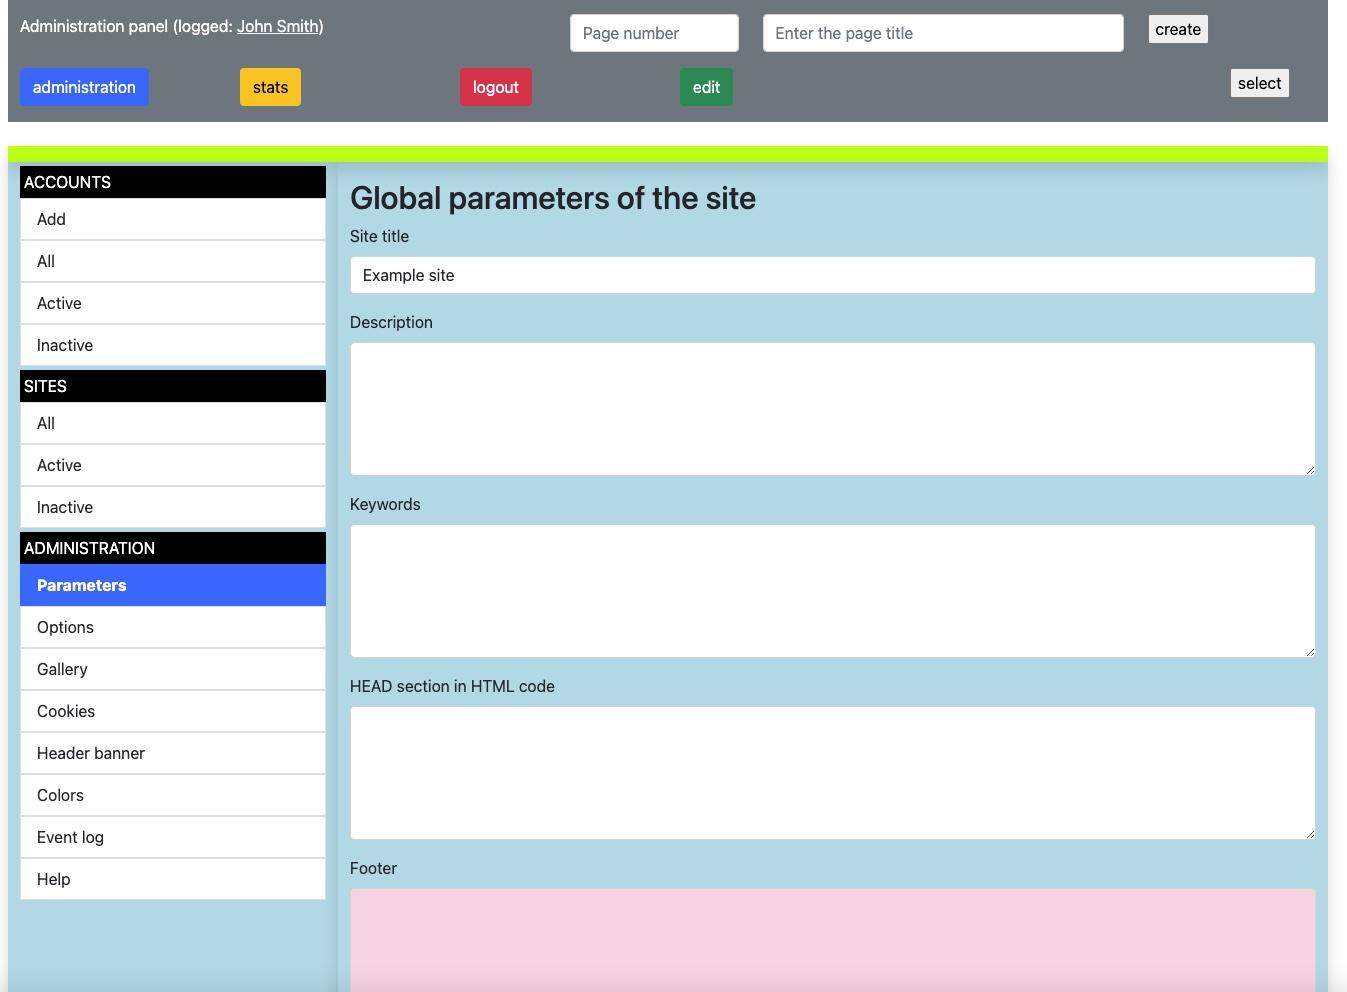
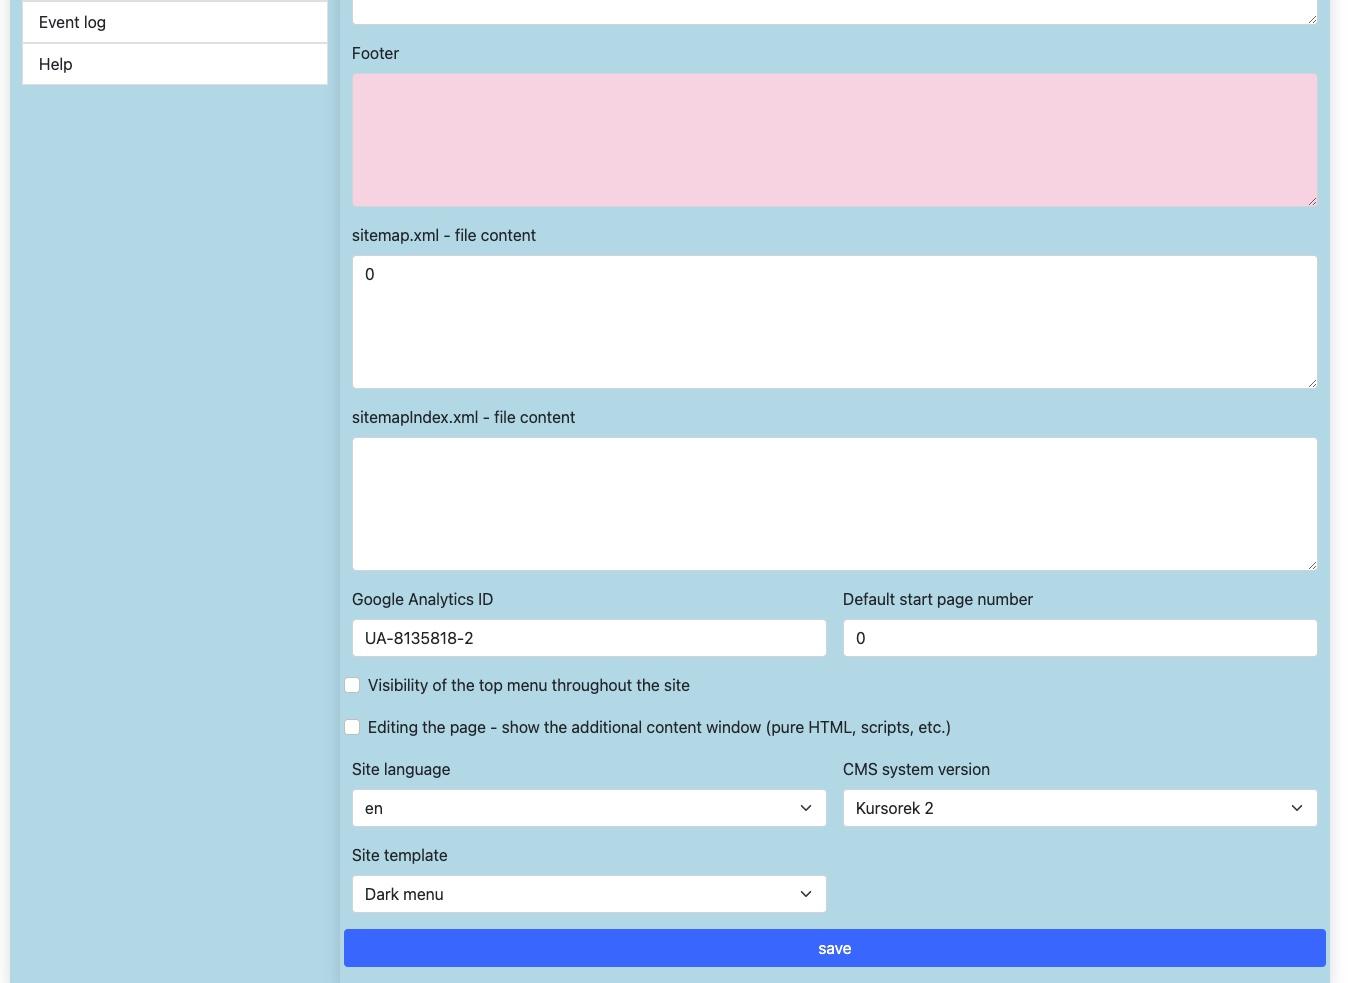
After clicking on the "parameters" option, we gain access to the form used to update important settings of our website (figures below).
We have:
“Site title” - First, we set the title of our site. It will be visible on the title bar of the web browser and in search engine results (e.g. Google, Msn, etc.). In accordance with the accepted standards, the title of each page on the website must be unique, so the titles of subsequent pages will be created according to the "from detail to general" principle, and so the page named "Contact" will have the title "Contact - title of our website". The name of the company/institution/blog works best in the title. This is one of the most important factors influencing the search position.
"Description" - You should not write effusively here, but briefly describe what our website is about. The more accurately and briefly we define the profile, the more we can count on new users visiting our pages.
"Keywords" - this is a parameter that provides search engines with information about the most common phrases on our website. We should not write too much here, it's better to focus on quality rather than quantity. I separate subsequent words with commas.
"HEAD section in HTML code" - this is a place to paste the HTML/JS code that will be used in the header part of each subpage of the website. This is a place rather for advanced users. They can be used to change the visual appearance of the entire website or use special JS scripts to enrich the functionality.
“Footer” - html code that is displayed at the bottom of each subpage of the website. If we do not know HTML, we can write here in natural language or prepare the content in the editor on any selected page and in the "Source" mode, copy the content in the HTML version to this field.
“sitemap.xml” and “sitemapIndex.xml” file content - this is the place to paste the prepared sitemap in XML format. For advanced users. For more information, please visit this page https://developers.google.com/search/docs/crawling-indexing/sitemaps/build-sitemap?hl=en
“Google Analytics ID” - a field for pasting the identifier assigned by Google in the Google Analytics service. For advanced users who need to track accurate statistics. Registration with Google is required. You can read more information at this address https://analytics.google.com/analytics/web/provision/#/provision
"Default start page number" - a field for entering the number of the page that is to be loaded first after entering the address of our website. If we leave the value "0" entered by default, the "news" module will be loaded, which is discussed in a separate chapter.
"Visibility of the top menu throughout the site" - here we decide whether our site will have a "Main menu", the so-called upper (see figure 1 in the chapter "Building a website").
"Editing the page - show additional content window (pure HTML, scripts, etc.)" - whether the website in edit mode should display additionally a window for pasting HTML code or JS scripts. For advanced users who want to extend the capabilities of their selected pages on the site.
“Website language” - selection of the language version of the entire website. Note: not to be confused with the language version of the interface. This parameter determines the language in which we will run our website and of course it may be different from the language version of the user interface.
“CMS version” - in order to maintain backward compatibility, we left the option of switching to the old version of our CMS system, but we hope

